Category Archives: electronics

Fun With Reed Switches

Back in January, I had just completed the Fuel Oil Level project and as a “wrap-up,” I posted my design process. In Part II, where I went into more detail about the sensor array and sender unit, I mentioned that the latching hall effect sensors had some peculiarities. Now that the unit has been “in field testing” for about a month and a half, I’ve discovered that, well, it doesn’t work.

More specifically, what does work: the transmitter, the Arduino software, and the receiver all appeared to work satisfactorily. Having done a fair amount of electronics design over thirty years or so, I know well enough that each component needs to be tested in breadboard, then in prototype on the bench, and finally, in the field. In this project, everything was tested, at every stage, several times. But obviously there’s something different about the conditions of the bench tests and the conditions in the field. I think I know the reason—I’m not totally certain—but I’ll explain more in a later post.

A Reed Switch Primer

So. Back to the drawing board for a way to detect the level of the fuel oil tank. I decided to try replacing the hall effect sensors with reed switches. I purchased a pack of 10 small surface-mount reed switches on ebay from Thrify’s Place, and when they arrived I set to work on a new design.
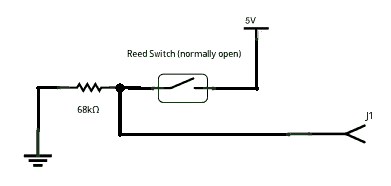
Basic Reed Switch Circuit

I had played with reed switches before, and I thought I knew enough to proceed with testing a new sensor array. I wanted the new array to use the same form factor as the old one, but I decided that I would separate the sensor from the rest of the electronics. Since my oil tank is indoors, it did not need to be covered-up—I could use rubber bands to hold it close to the float guide and use ribbon cable to run the ten or so wires to the Arduino and transmitter.

Reed switches are hermetically sealed in a glass enclosure and have two slightly overlapping leads made of ferrous metal. In a normally-open reed switch, the leads close when in the presence of a magnetic field. That’s all there is to it. So I experimented with a single switch to make sure I was understanding how to properly wire it up. In my basic reed switch circuit, J1 is the output that goes to a digital input pin on the Arduino. This is normally held low by a 68k resistor, and when the reed switch closes, it completes a circuit to 5v, which drives the output high.
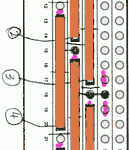
First Veroboard Attempt
First Stripboard Attempt with Vertical Reed Switches

So I set about making eight of these little circuits and soldering them to a veroboard. I attached the reed switches lengthwise along the stripboard strips and staggered them so that the centres of each reed switch would correspond to a different level of the oil tank. In workbench testing I found that the results were erratic. It didn’t seem to make sense, so I rigged up the same arrangement on a breadboard—and I received the same erratic test results. As it was a Saturday afternoon, I decided to take a nap, and once refreshed, go back to school…
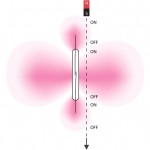
 

The Reasons for Erratic Behaviour in a Reed Switch

Meder Electronic sells reed switches and they have compiled a very complete set of resources on these devices. I found an excellent paper (PDF) on the myriad ways one can configure a reed switch. The Meder article explained the erratic behaviour of my array: depending on the orientation of the magnet in relation to the reed switch, the switch itself can have several areas where it is sensitive to a magnetic field. I was not aware that the ends of the switch are sensitive in addition to the areas in the centre of the switch.

As the magnet passes by the switch, it may intersect the sensitive area at one end of the switch, closing the contacts. As it moves closer to the switch, it leaves the end sensitive area (causing the contacts to open), then it enters the main side sensitive area, closing the contacts again. As it passes, the magnet can cause the switch to open and close three times.

A Second Design
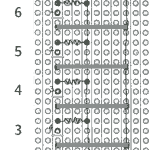
Reed Switch Array, version 2

Armed with my new knowledge, I designed a new sensor array, this time with the reed switches oriented horizontally. The reed switches, represented in brown, are soldered onto lines 8 and 15 of the stripboard, and the eight pink lines indicate cuts in the strip. My intention is to mount the array so that the magnet moves across the right ends of each reed switch. This way the magnetic flux would act only once on each switch. A test with the array held manually onto the oil level gauge was successful, but I think that the placement of the array in relation to the magnet on the gauge is going to be the tricky thing.
A Design for a Remote Fuel Oil Gauge II

In my first post for this project I outlined its overall design. In this post I’ll describe the “sender” unit that senses the fuel oil level, interprets it as a three-bit number and sends this number to the receiver in the kitchen.

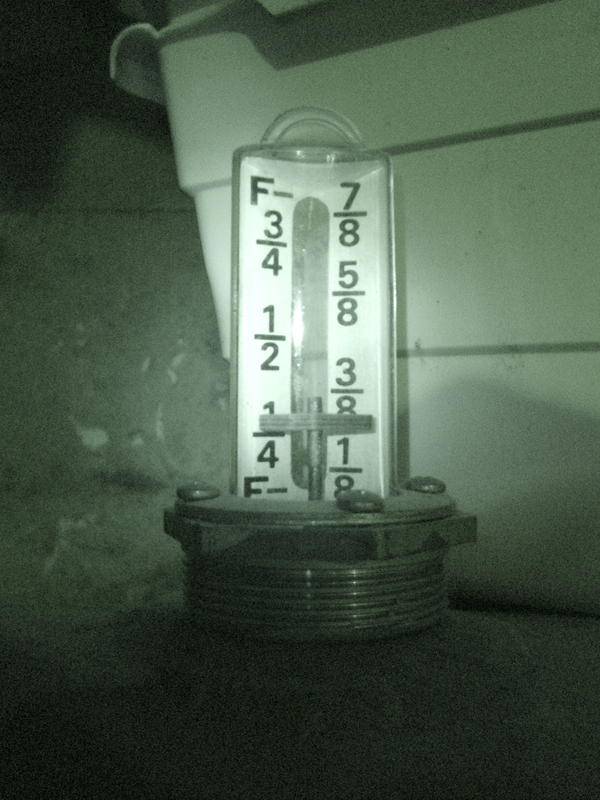
This is a photograph of the mechanical gauge, which shows the level as eights of a tank. The float that moves up or down will provide the shelf upon which I’ll glue a small rare earth magnet.

To ensure that the magnet is sensed, I had to do some careful measurements and calculations: the clear plastic covering of the gauge has a cross-section that is oval, and it is also tapered slightly so that it has a smaller diameter near the top.

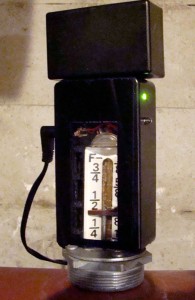
My plan was to fit a plastic box over the gauge so that the sensors would be as close as possible to the magnet, and to allow for visual inspection of the gauge at any time.

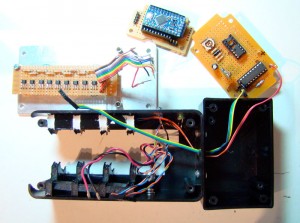
I mocked up a test using some scrap foamcore and blue modeling foam to see how a box could be snugly fitted to the gauge. I decided that a good solution would be to create carefully cut foamcore ribs for the inside of the box that would hold on to the sides of the gauge yet still allow for room of the sensor unit and other electronics. As I discovered later, I did not have enough room for the radio circuit, so I had to add another small box on top of the main box. If I do this again, I’ll use a bigger box.

I cut a long hole along the length of the box so that anyone could see the mechanical gauge, given enough light. The sender unit slides down over the gauge and can be easily removed for maintenance.

The SS461A hall effect sensors that I purchased from Jameco are “latching,” which means that when a magnet passes one in one direction, it turns on and stays on until the magnet passes in the opposite direction. This is good in one way, and bad in another.

The positive aspect of latching in this context means that, as the fuel oil tank is filled, the gauge goes up and progressively latches each sensor “on” as it passes. You could read the sensor array and it present it as a bargraph. As the oil is used and the level begins to move down, the topmost sensor is turned off, then the next in line is turned off, and so on.

The negative aspects of this arrangement only presents itself outside of normal operation. Say, for example, there is a power failure? How does the sensor array know where the magnet is? Furthermore, there is a “NOTICE” on the spec sheet that reads: “Interruption of power to a latching device may cause the output to change state when power is restored. If a magnetic field of sufficient strength is present, the sensor output will be in the condition dictated by the magnetic field.” In other words, you may get errors when the power is returned. Some sensors that were “off” before power was removed, could change to “on” and vice versa. I didn’t realize this until late in my testing. I need to keep an eye on it to see if this presents a problem in actual use.

Sensor Main Logic Schematic
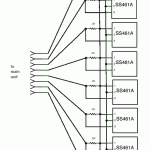
Sensor Array Schematic

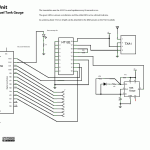
The Sensor Main Logic Schematic shows that all the digital input/output pins on the Arduino are in use. D12 is used as a “low oil warning light”: when the level reaches the last sensor, this LED starts blinking on the sender unit. Most of the other digital pins are configured to accept input from eight hall effect sensors (refer to the Sensor Array Schematic).

The Holtek HT12E chip is an “encoder” that accepts a parallel 4-bit binary value (only 3 are used in this application) and sends it serially to an On-Shine TXA1 transmitter. The TXA1 is one half of a receiver circuit pair RXA27. These are normally used in radio-controlled toys, where simple commands like forward/reverse/right/left need to be communicated, or in simple security systems. The Holtek has an internal oscillator, configurable with a resistor between pins 15 and 16 (I’m using something close to 400k).

The Transmit Enable on pin 14 has to be low to send the data to the transmitter. In my original design, I wanted to transmit every 20 seconds, so I added a 555 timer chip in astable mode. This worked fine in test mode but before I closed up the boxes, I took the chip out and connected pin 14 to ground to force the unit to transmit all the time.

Arduino Sketch for the Sender Unit

The sketch tells the Arduino to poll each sensor from 7 to 0 (from the top sensor to the bottom sensor). If the sensor is “on”, then send the binary number of that sensor out to the transmitter. Once it hits a sensor that is “on” then it dumps out of the if/else loop.

/* version C of oil tank level
revised Sept. 23 09 to account for correct reading on
power-up
revised Oct. 5 09 to release pin 2 for use by radio transmitter
revised Feb. 16 2010 to refine sensor logic
revised Feb. 23 2010 to change active sensors (ignore sensor 10 rather than sensor 3)
by Michael B. LeBlanc, NSCAD University */

int level; //the reading from the oil tank gauge

void setup() {
pinMode(12, OUTPUT); // warning LED
pinMode(2, OUTPUT); // D0 to TX
pinMode(11, OUTPUT); // D1 to TX
pinMode(13, OUTPUT); // D2 to TX
}

void loop() {
// determine the gauge level
// start with the highest sensor and work down

int sensorValue = digitalRead(3);
if (sensorValue == 1)
{
level = 7;
digitalWrite(2,1);
digitalWrite(11,1);
digitalWrite(13,1);
}
else
{
int sensorValue = digitalRead(4);
if (sensorValue == 1)
{
level = 6;
digitalWrite(2,0);
digitalWrite(11,1);
digitalWrite(13,1);
}
else
{
int sensorValue = digitalRead(5);
if (sensorValue == 1)
{
level = 5;
digitalWrite(2,1);
digitalWrite(11,0);
digitalWrite(13,1);
}
else
{
int sensorValue = digitalRead(6);
if (sensorValue == 1)
{
level = 4;
digitalWrite(2,0);
digitalWrite(11,0);
digitalWrite(13,1);
}
else
{
int sensorValue = digitalRead(7);
if (sensorValue == 1)
{
level = 3;
digitalWrite(2,1);
digitalWrite(11,1);
digitalWrite(13,0);
}
else
{
int sensorValue = digitalRead(8);
if (sensorValue == 1)
{
level = 2;
digitalWrite(2,0);
digitalWrite(11,1);
digitalWrite(13,0);
}
else
{
int sensorValue = digitalRead(9);
if (sensorValue == 1)
{
level = 1;
digitalWrite(2,1);
digitalWrite(11,0);
digitalWrite(13,0);
}
else
{
level = 0;
digitalWrite(2,0);
digitalWrite(11,0);
digitalWrite(13,0);
}
}
}
}
}
}
}

delay(200);

// blink LEDs on pin 12 if tank is 1/8 full
if ((digitalRead(12)==LOW) && (level < 1))
{
digitalWrite(12,HIGH);
delay(100);
}
else
{
digitalWrite(12,LOW);
}
}


Creative Commons License
Remote Fuel Oil Tank Gauge by Michael B LeBlanc is licensed under a Creative Commons Attribution-Noncommercial-Share Alike 2.5 Canada License.
Permissions beyond the scope of this license may be available at mleblanc@nscad.ca.

Decoding DTMF with Arduino and the MT8870

MT8870 demonstrationLast August I was experimenting with DTMF (dual-tone multi-frequency) and Arduino. I posted a video on YouTube that illustrates a proof-of-concept using the MT8870 tone decoder chip.

A few people have asked me to include the code and schematics for this demonstration: the code is below, and the schematics were derived from the MT8870 datasheet. Look for the figure titled “Single-Ended Input Configuration.”

/***********************************************************
 DTMF Decoding with MT8870 chip
************************************************************/
int keyvalue;  // the number associate with the tone

void setup()
{
 Serial.begin(9600);
 pinMode(6, INPUT); //input binary 1's digit from decoder chip
 pinMode(7, INPUT); //input binary 2's digit from decoder chip
 pinMode(8, INPUT); //input binary 4's digit from decoder chip
 pinMode(9, INPUT); //input binary 8's digit from decoder chip
}

void loop()

// first determine the base ten value of the key, from 0-11
{
 if (digitalRead(6) == HIGH) //if binary 1's is high
 {
 keyvalue = 1;  //make keyvalue equal 1
 }
 else
 {
 keyvalue = 0;  //otherwise make it zero
 }

 if (digitalRead(7) == HIGH)  //if binary 2's is high
 {
 keyvalue = keyvalue + 2;  //add "2" to keyvalue
 }
 if (digitalRead(8) == HIGH)  //if binary 4's is high
 {
 keyvalue = keyvalue + 4;  //add "4" to keyvalue
 }
 if (digitalRead(9) == HIGH)  //if binary 8's is high
 {
 keyvalue = keyvalue + 8;  //add "8" to keyvalue
 }
 // now convert keyvalues 9, 10 and 11 to "0", "*" and "#"
 if (keyvalue == 10)
 {
 Serial.println("0"); //print zero key
 }
 else
 {
 if (keyvalue == 11)
 {
 Serial.println("*"); //print asterisk key
 }

 else
 {
 if (keyvalue == 12)
 {
 Serial.println("#"); //print pound key
 }

 else
 {
 Serial.println(keyvalue); //it isn't a special key so just print it
 }
 }
 }
 delay(100);
}

Creative Commons License
Decoding DTMF with Arduino and the MT8870 by Michael B LeBlanc is licensed under a Creative Commons Attribution-Noncommercial-Share Alike 2.5 Canada License.
Permissions beyond the scope of this license may be available at mleblanc@nscad.ca.