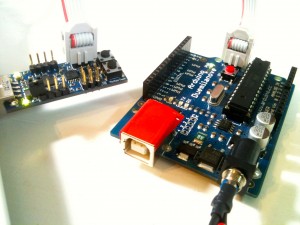
 If you’re interested in working with Arduino microcontrollers, eventually you become hip to the idea that you don’t need to buy expensive Arduino UNOs for your projects. It’s relatively simple to wire up your own minimal Arduino, saving 80% under the cost of an UNO or Duemilanove. I develop on a Duemilanove, and when I need to commit the work to the final project, I can pop out the ATmega328 chip that’s in the Arduino and plug in a fresh ATmega328 to program it. Actually though, you can’t just use any ATmega328 chip — it needs to have a “bootloader” program flashed onto it before it can work with the Arduino system. You can buy ATmega328’s with the Arduino bootloader, but these go for around $4.00 each. You can buy the same chips without the bootloader for about a dollar less, or more than that if you buy in bulk.
To install the bootloader software, you need a device that hooks into the ISP plug on your UNO or Duemilanove. I had an AVRISP mkII that I bought a few years ago, but it stopped working so I needed a replacement. Although I could use my BusPirate as an AVR Programmer, the documentation for that uses the command-line AVRDUDE to communicate with the chip. I wanted to use a toolchain I was more familiar with, the free AVR Studio, version 4.
I bought the replacement a couple of months ago on ebay: ZeptoProg II is an inexpensive AVR programmer with USB interface, and works with AVR Studio. It also sports a 4-line logic analyser and frequency output and measurement, and a few other widgets that I probably won’t ever use.
Most of the time involved in setting things up relates to installing AVR Studio. The version I use is 4.18, so you need to download the core version and then upgrade it incrementally with several service packs. Although I’ve been a Mac person since 1984, I develop on a Win7 netbook partly because AVR Studio on Mac OS X has not been kind to me.
The Guide
I’ve prepared a PDF Guide to Burning Arduino Bootloader using ZeptoProgII and AVR Studio.
Once you’ve mastered this, you can go on to bypass the Arduino altogether: for example, if you are running out of space on your ATmega chip, you can erase the bootloader — gaining about 2k — and use the programmer to flash the HEX file that you created when you compiled the Arduino program onto the chip. An added bonus to removing the bootloader is that on power-up or reset, your project starts faster because it doesn’t have to run the bootloader code.