I’ve not been posting consistently lately. The main reason is that I’ve been indulging my curiosity in radio technology. It started when I wanted to learn more about the wireless systems that I was building into my Arduino projects. The explorations and experimentation into radio have taken over, but I’ve not been able to answer in my own mind where this was taking me, until now.
So I’ve been building and playing with radio-frequency (RF) circuits, starting with oscillators, moving on to amplifiers and then simple radio receivers.
Some history might be helpful: A hundred years ago, when radio was new, experimenters built their own radio gear. The first radio transmitter was a device that made a spark, and a little later, sparks—which splashed energy promiscuously across a wide spectrum of frequencies—were replaced by narrow-frequency signals that could coexist with other signals with a radio that could select (or tune) into one signal and ignore the others. This signal is produced by an oscillator, which vibrates at a frequency of several million times a second.

Wireless signals—whether they be wifi, Bluetooth, FM or your garage door opener—all use oscillators to carry information. So step one in anyone’s search for knowledge in this field is to build an oscillator.
Actually, there’s a step zero: in Canada, the electromagnetic spectrum is considered public property. You just can’t set up a transmitter and spew electric energy in all directions. You need to abide by a set of regulations set by Innovation, Science and Economic Development Canada, and above a certain power level for your transmitter, you may need to obtain a licence. In my case, I have a Basic with Honours amateur radio license VE1LEB, which allows me to experimentally transmit, using commercially-designed equipment, up to 250 watts in certain high-frequency bands. Unless I upgrade my licence to “Advanced”, I’m not allowed to employ a transmitter that I build myself — unless it’s a kit and/or I’m transmitting at a very low level.
So when I build experimental oscillators, I’m only allowed to run them at very low power so that they can’t be heard more than a few metres from my house.
Here’s a practical example from last summer: I wanted to test the performance of a radio that receives signals in the AM broadcast band, between roughly 500-1600 MHz, but in Halifax, Nova Scotia, all of the AM broadcasters have vacated this band in favour of the FM band. So when you turn on an AM radio in Halifax (during the day, at least), you’ll get noise, hiss, static, but nothing intelligible to a human. So I had to build my own little radio station that would modulate an audio signal from a CD player with a carrier wave around 1000 KHz. Tune the radio to around 1000, and you should hear music (but only if the radio is sitting next to the modulator circuit).
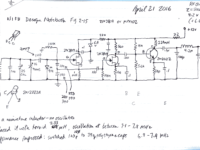
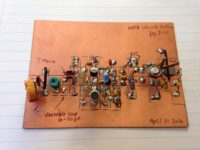
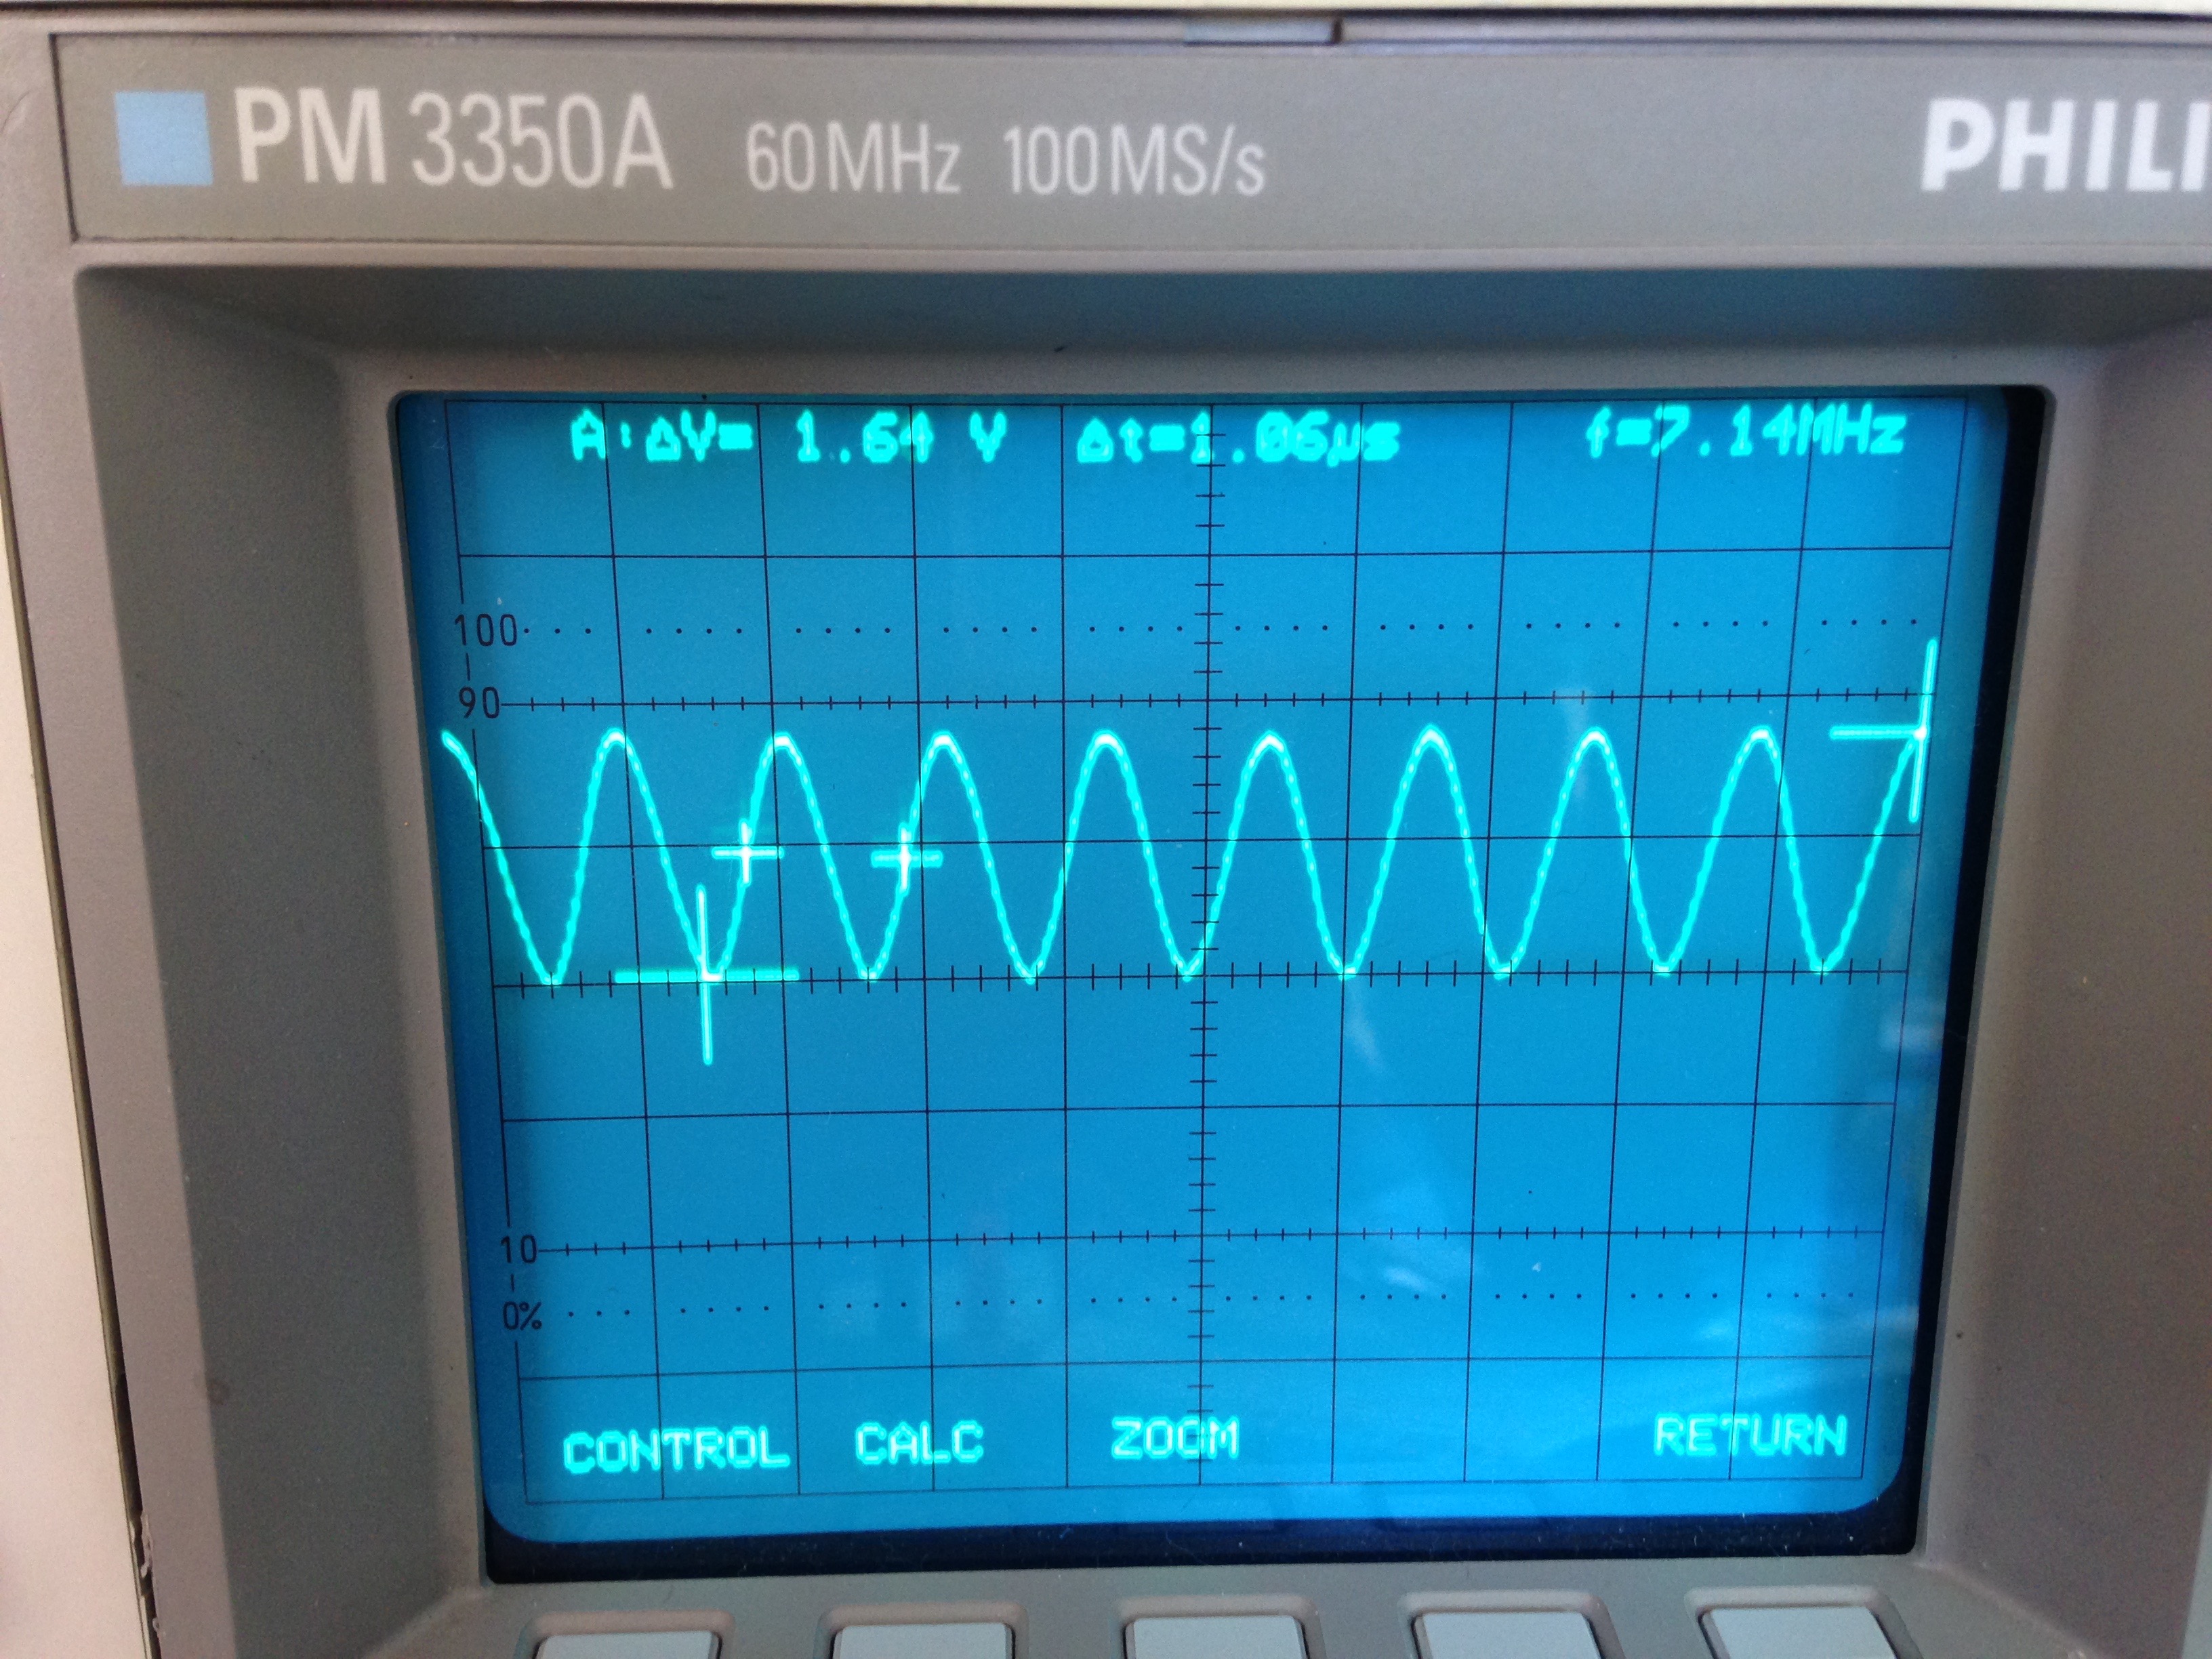
Here’s another example from last Fall: this circuit is from a design by Doug DeMaw W1FB that combines an oscillator with an amplifier. It’s a VFO (variable frequency oscillator) with a buffer amplifier that can be used as a stage in either a transmitter or receiver. The circuit was built on a single-sided PC Board, with islands of copper cut out using a copper engraver’s burin—a tool acquired during my days as a Fine Art Major. The components are soldered onto the islands. The rest of the copper is known as a ‘groundplane’: reserved for connection to zero volts (ground).

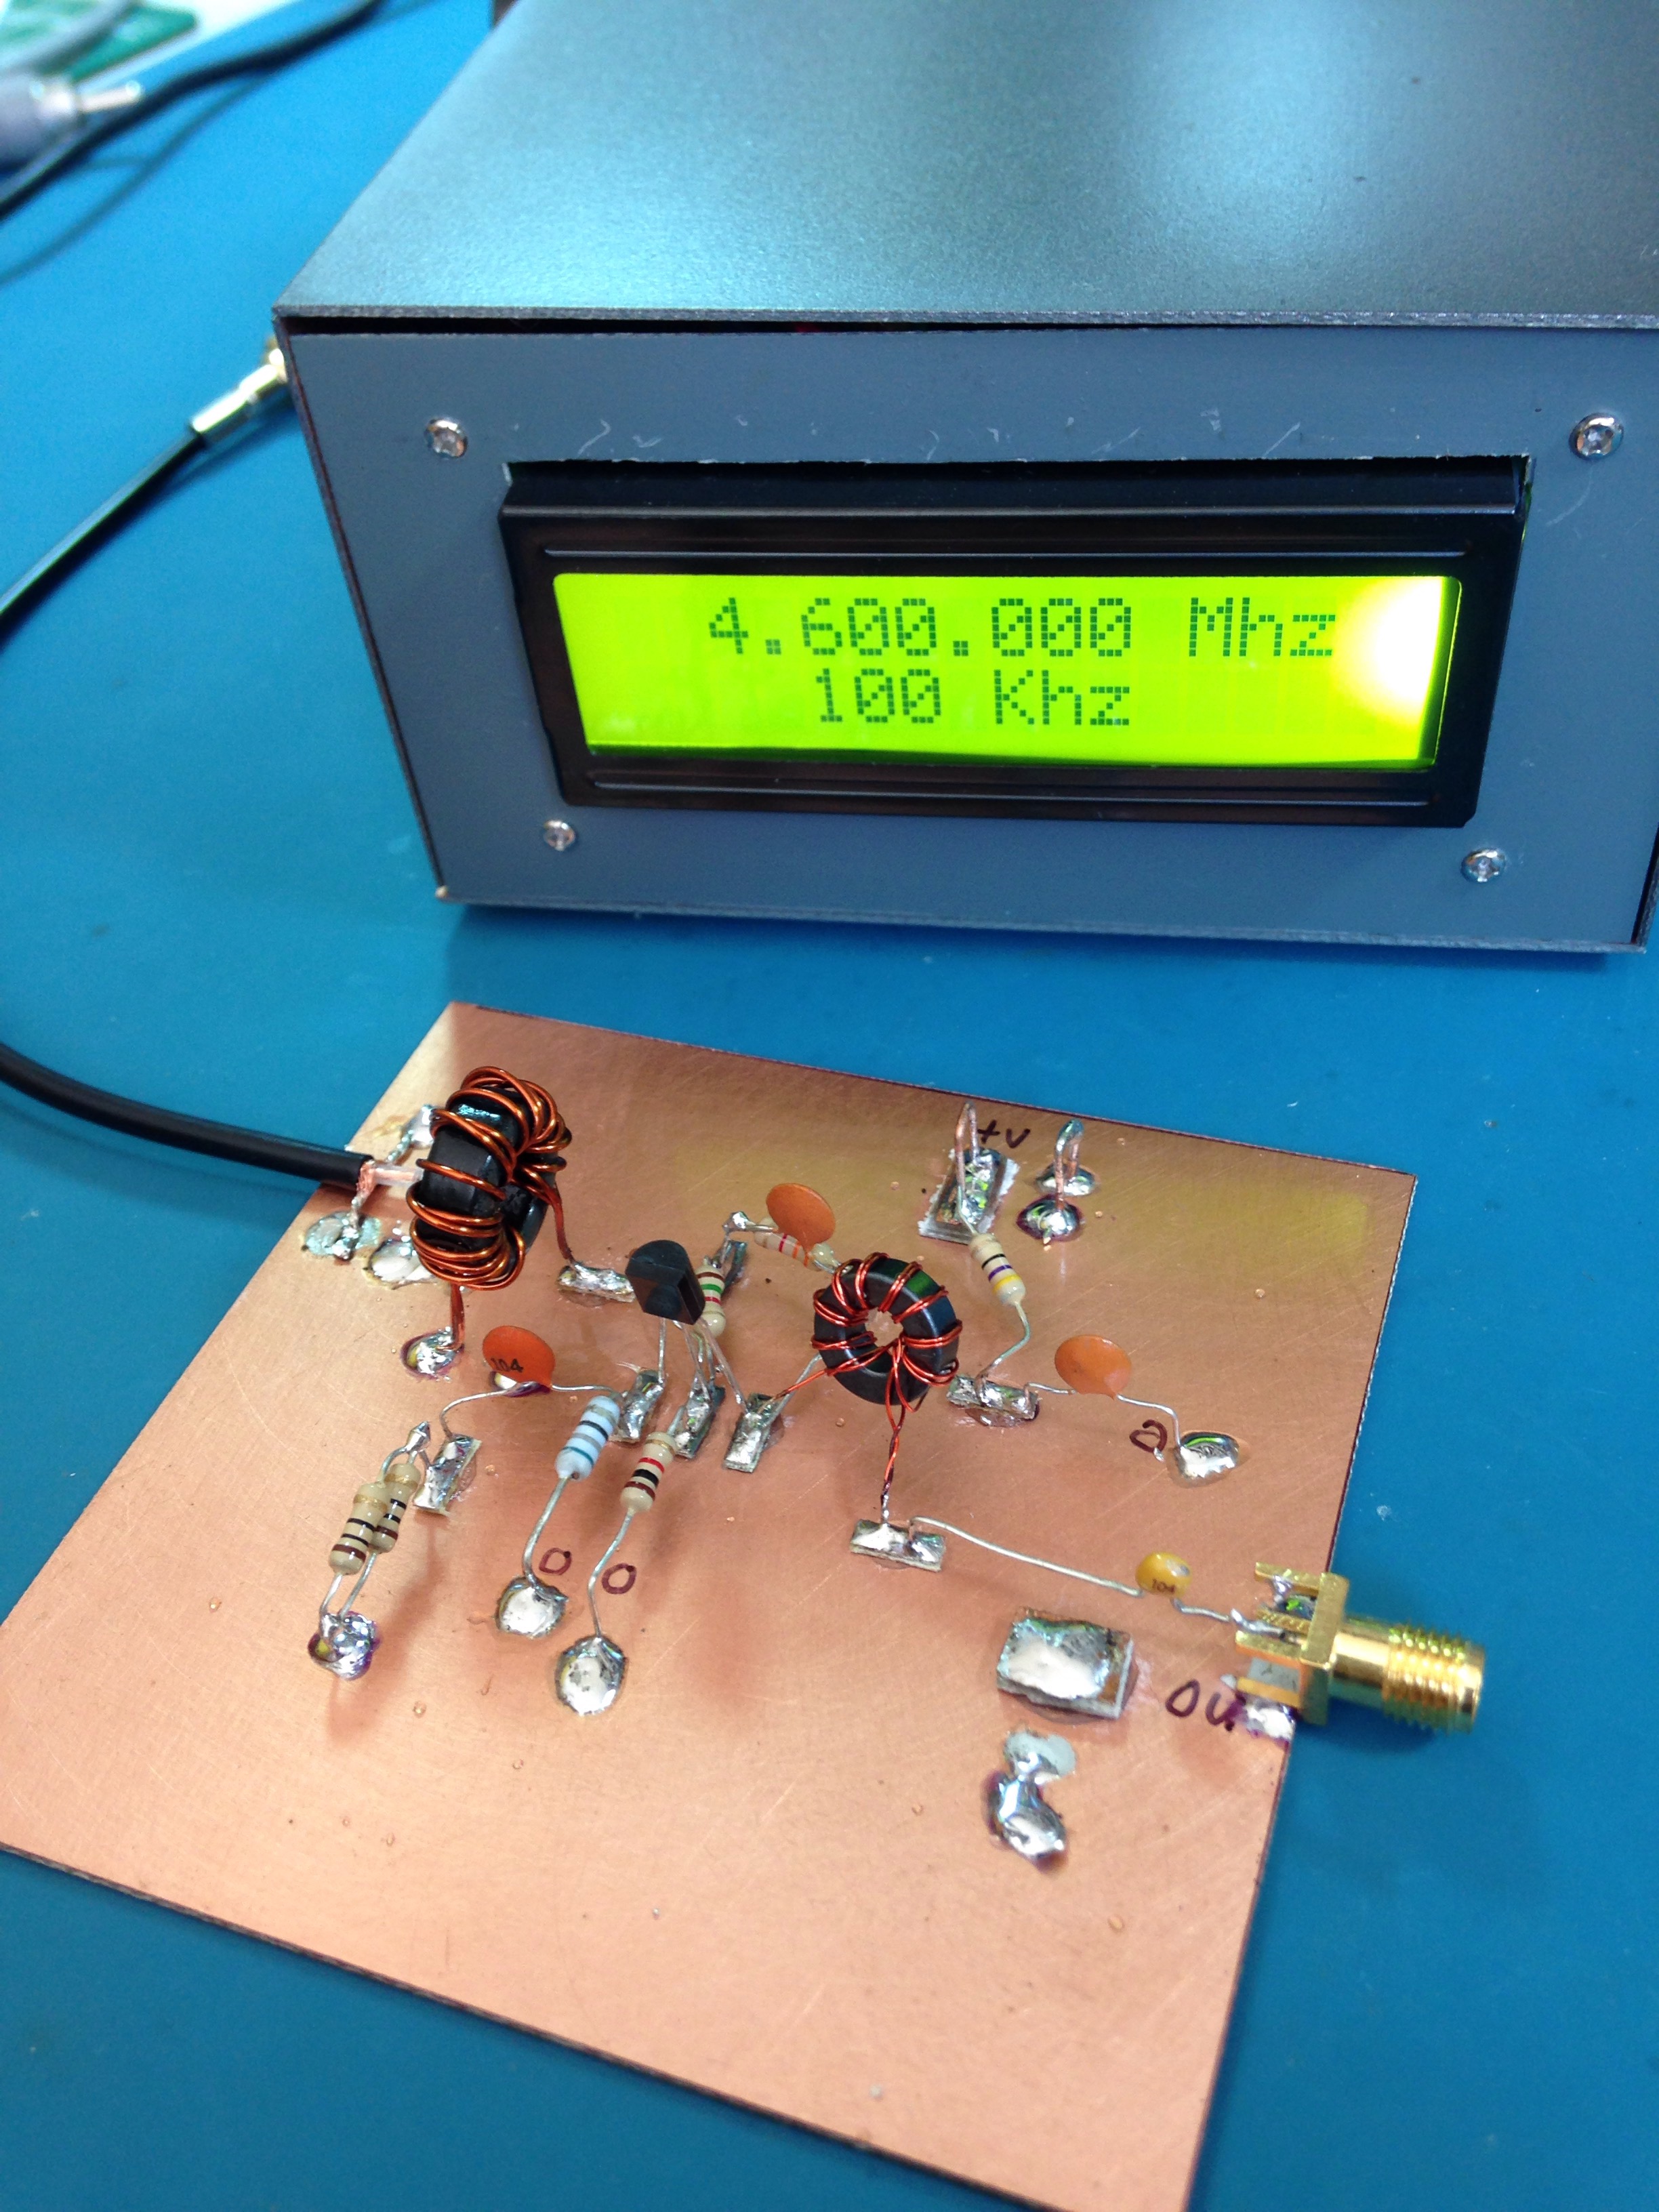
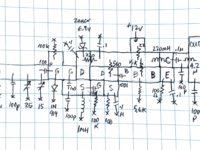
After that, with an increase in confidence, I moved on to building simple radio receivers. The first one used an amplifier design from the book “Crystal Sets to Sideband” by Frank Harris K0IYE. It’s known as a direct conversion receiver, one that’s unusual from most radios we use today because it doesn’t make use of intermediate frequencies to step the signal down from it’s original frequency to audio frequency. The radio is composed of an oscillator an RF board and an AF amplifier.

The radio signal is brought into the receiver via a coax cable gold connector at the top left. This signal is mixed with a sine wave signal at almost the same frequency as the one we want to tune to. By varying the frequency of the oscillator, we can tune into different frequencies, which will be displayed on the frequency generator unit. When these two signals are combined, the difference frequency is the audio from the radio station. This low-level audio is transferred to the lower board with a short coax cable to the audio amplifier, which drives small earbuds for listening. The battery pack at the top right delivers about 12 volts to the radio.
This report gets me caught up to late October 2016. My next post will introduce “regens“. I realize that I haven’t revealed where all this activity is taking me in my design research. It will come in later posts.
73!